HDR Photography – Oloneo HDRengine versus Photoshop CS5
It’s quite a while now since I did any comparative work on HDR. I have previously superficially examined Photomatix V3 and Picturenaut. For some time after that, I mostly used Photomatix version 3. I never upgraded to version 4 because, by that time, I had found that Photoshop’s HDR engine was relatively easy to use and worked seamlessly with Lightroom. So, I have tended to migrate gradually away from Photomatix and have been using Photoshop with quite satisfactory results, for example the Media City Panoramas from just a few weeks ago.
But now I think I might have found something even better. Oloneo HDRengine
I recently downloaded a free 30 day trial of Oloneo and today is my last day with it before I decide whether or not to buy. The good thing about Oloneo is that it is totally intuitive. It boasts the fastest HDR engines available “allowing real-time tone-mapping and HDR manipulations”. Certainly I needed no tutorial to use it and found that the sliders were very responsive and gave me what I wanted very quickly and with the minimum of frustration. It has full RAW file support and works especially well performing a tone-mapping (or pseudo-HDR) from a single RAW file. There are lots of pre-sets to choose from, but to be honest, I only find them any use as a starting point and generally would perform my own tone mapping without resorting at all to the pre-sets. But beginners in HDR might find the presets very useful.
The comparison – Photoshop vs Oloneo
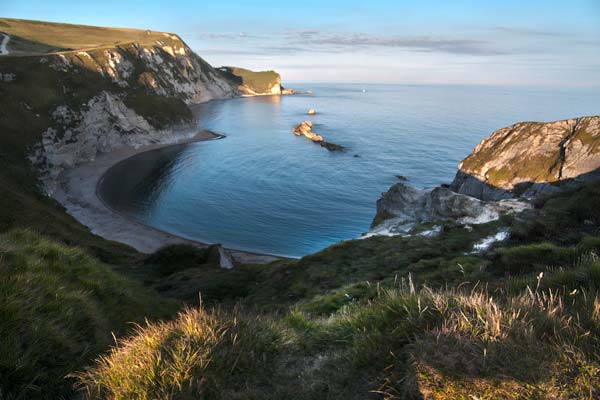
I found a particularly difficult subject – Man O’ War Cove, in Dorset. We had arrived too late in the afternoon and the sun had dipped down behind the surrounding hills. The foreground was very dark and the sky very bright. I did not have a tripod with me. I took three hand-held shots, bracketed 2 stops apart, which are shown below and which didn’t line up very well.:

Below you can see the Tone Mapped Version from Photoshop followed by the tone mapped version from Oloneo.
Generally, I would open up my tone-mapped image in Photoshop to “finish it off”. For example I might do some burning and dodging and a vignette, but the images here are just as they came out of the tone-mapping process.


Next, I took a closer look at the two completed images, taking a 600×400 pixel crop out of the shots at roughly the same place in each:

Oloneo version: When you look at the edge of the cliff top left, there is a very slight double edge along the cliff edge, just about visible at this size. The sky has some noise, but it would be easily treatable.

But look at the crop in the foreground area in the next picture:

Photoshop version. The bright grasses in the foreground have been aligned fairly well with little ghosting, but look at the darker grasses behind. The ghosting is very bad and the shot has therefore been rendered unusable.

For this image, I would certainly prefer Oloneo. The very slight ghosting at the cliff edge and the noise in the sky would be easy to treat. The foreground grasses are crisp and a little unsharp mask is all that it needs, plus possibly a subtle vignette to finish it off.
Repeat test
I was so surprised at the poor result above from PhotoShop that I repeated the experiment to ensure that I hadn’t done something silly, like having forgotten to tick the “remove ghosts” button, for example! In fact I found I had exactly the same result the second time and the “remove ghosts button” was definitely ticked…quite conclusive and again a totally unusable result!
Conclusion
It’s fair to say that I have been using Oloneo now for only 29 days. Tomorrow my 30 day trial will be over and I have to decide whether or not to buy. Over the last few weeks I have found that, in most cases, Oloneo has produced an end result more to my taste and more easily achieved than with Photoshop. Something that I especially like about Oloneo is that it is truly WYSIWYG…when you open the finished product, it really does look like you expect it should. Once or twice Oloneo has produced some artefacts that were worse than the Photoshop version. Maybe the fairest conclusion is that it is another useful tool in our editing toolbox. A very good tool.
If you want to try Oloneo for yourself, you can download the trial version.
Update 2nd August: Sooooo, we bought it 🙂