Portrait Lighting Ideas
We had a useful portrait lighting session at my photographic society last week, when we were able to observe the effect of using different positions of studio flash units, different ratios of lighting and various modifiers (honeycomb, snoot, barn doors, diffusers). In my “professional life” (some years ago now), I became very familiar with using Elinchrom D-lites to photograph commercial clients, products and various types of events. However, I never experimented much beyond that which satisfied a client brief. In my “amateur life”, I have tended to use natural daylight augmented with fill flash to photograph people, mostly at outdoor events.
Why the revived interest now, then, in studio lighting? I suppose it is because I am missing out on so many events that give me the opportunity for people photography that I am seriously considering whether to work more with studio lights. This brings lighting techniques back to the forefront of my thoughts. Writing my thoughts down reminds me of some of the techniques I have used in the past.
What makes good lighting? In the final analysis, my main consideration is whether the lighting looks pleasing, or at least achieves what I set out to do. As a photographic judge, I don’t concern myself with analysing the type of lighting (clamshell, Rembrandt, short etc). I simply concern myself with whether or not the final result suits the image and adds something to it emotionally. I think the hardest thing, when practising lighting techniques, is recognising when the lighting works. Using modelling lights, often provided in studio flash units, can help to predict the final balance of the lights.
These days we are also fortunate that we can look at the histogram and view the camera’s screen in a “trial and error” method, but how bored is the model going to get while you are practising in real time? Isn’t it better to understand at least the basics of how lighting works and achieve a good starting set-up with confidence?
Examples of lighting methods
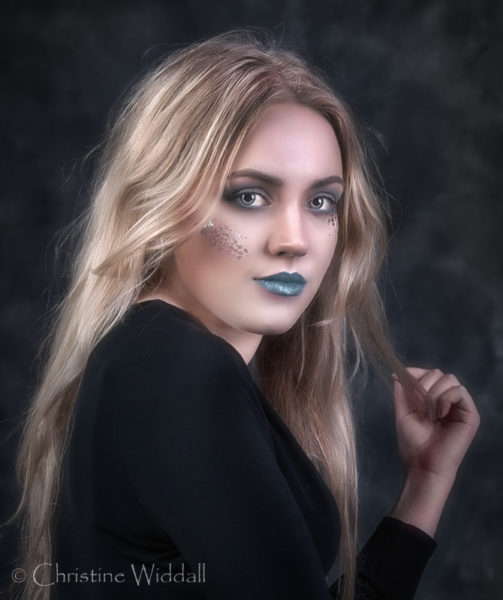
Two lights at 45 degrees
The portrait below of Robyn is rather flatly lit, reminiscent of some magazine lighting (though I have noticed these days that more modelling is creeping in to front page images). You can see from the pupil reflections that Robyn was lit with two soft-box lights without a lot of difference in brightness…this is achieved by setting up the two softboxes at 45 degrees to the model and setting their output almost equally. Fortunately Robyn has beautifully proportioned features, so the lighting suits her, but there is no drama created. The flat lighting here has been further accentuated with soft focus in post processing.
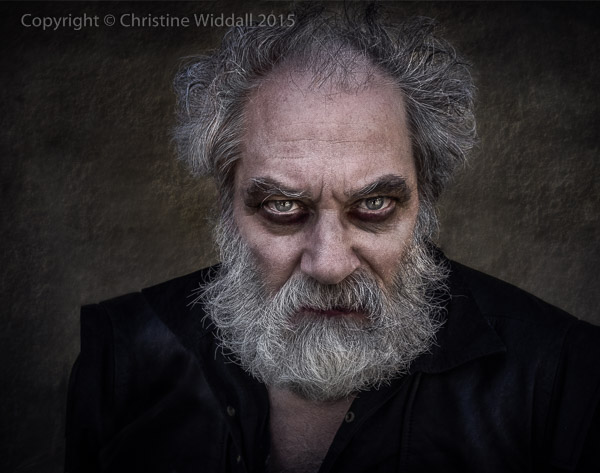
Short (narrow) lighting
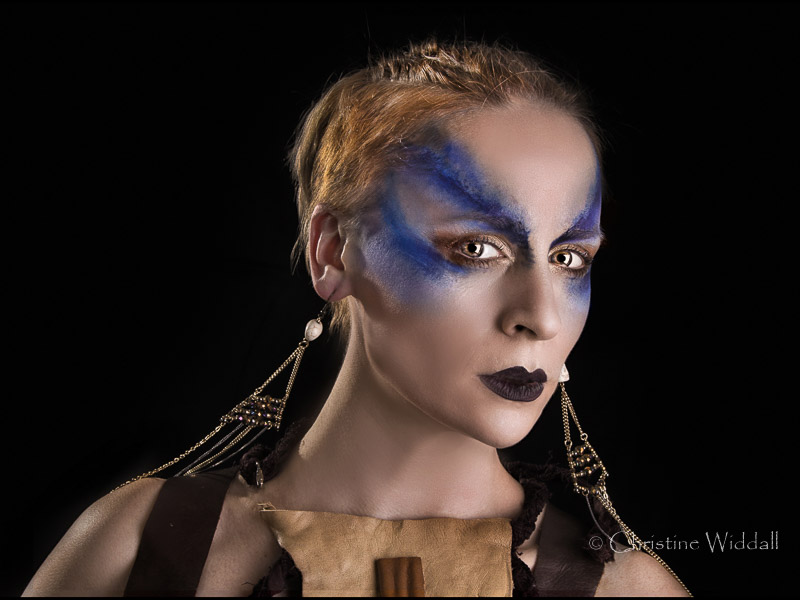
Below is a photograph of Amy. It employs what tends to be called “short” or “narrow” lighting, where the shadowed part of the face is nearest the camera. The fill light is placed almost behind the model to the left (her right), giving a light to the hair and rim-lighting the neck and ear. You can see from pupil reflections that the brightest light is off to the right side (her left) and its position allows a little light to spill onto her right cheek. This kind of lighting tends to make faces look longer and slimmer.
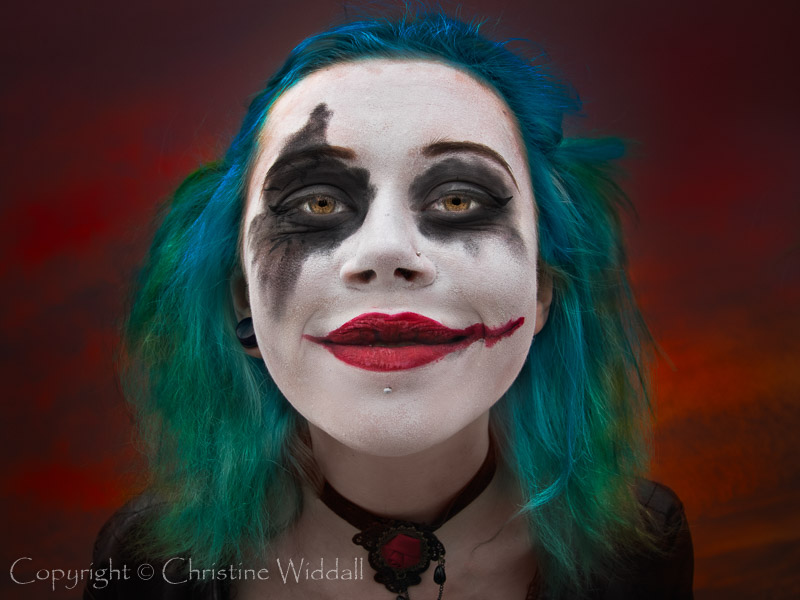
Broad lighting
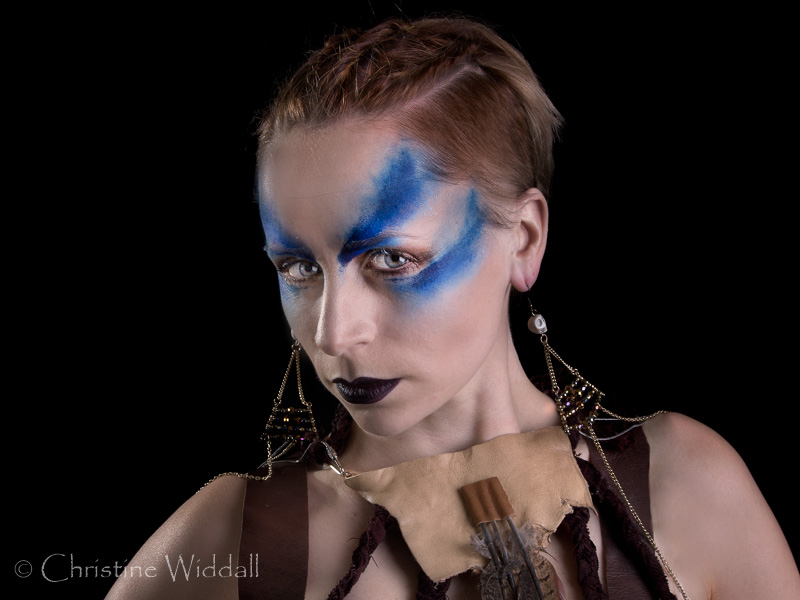
Below is Amy again with an example of “broad” lighting, where the brightest light is on the side of the face towards the camera. Broad lighting would make the face look a little wider. Does Amy’s face look wider in this shot than the previous one? I think so, what do you think? The more I look at the photo, though, the more the highlight on the nose annoys me. That should have been noticed and fixed at the time.
Butterfly and Clam-shell
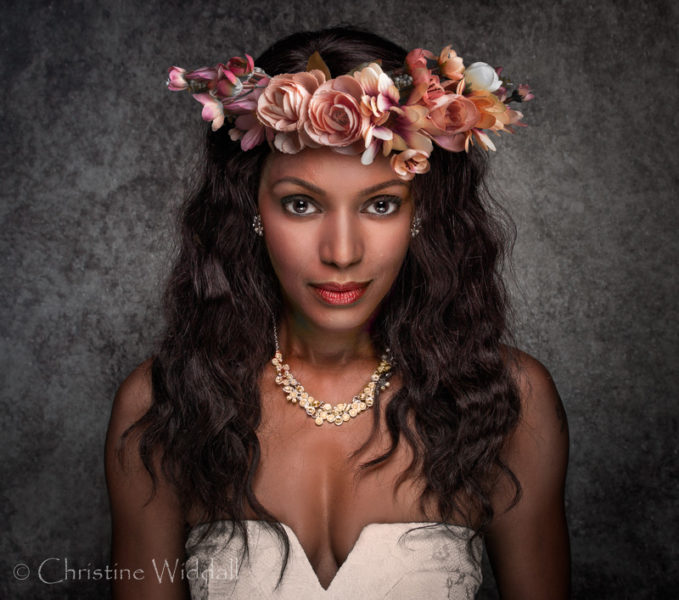
Another type of lighting, which used to be used extensively by Hollywood studios, is sometimes called “butterfly lighting” because a strong “butterfly” shadow is created directly under the nose…and it is said to make the face more glamorous. It’s not a light type that I use (because I don’t like the strong butterfly shadow), so I haven’t an example of my own, but it was very popular from the 1940s onwards with the influence of the “starlet” portraits. The light needs to be in front of the subject and angled downwards from about 3 feet above the subject’s head, so a stand with a boom arm is needed. Add a reflector or gentle fill light from below the face to soften the “butterfly shadow” and you now have “clamshell” lighting, which is very popular today. Below is Natasha, lit by clamshell lighting. Use a silver reflector to keep the colour of the light neutral – use a gold reflector to add some warmth to the reflected light.
Rembrandt Lighting
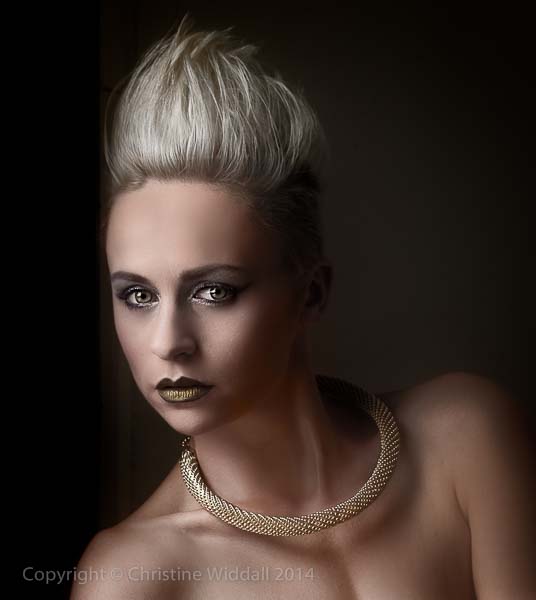
The next photograph, also of Amy, is one of my personal favourites. She is mostly lit from the left (her right) with natural window light. I used the tiniest bit of fill flash, bounced off the ceiling behind my head, to ensure the left side of her face wasn’t solid black. If I were to describe the type of light, I would say it is Rembrandt lighting. The spill of light onto the left side of her face makes a soft inverted triangular highlight on the cheek, more than in the photo above…and in my opinion gives a really pleasing effect. It is typical of the lighting used by Dutch painter Rembrandt in his portraits and is achieved by the use of one main light (Rembrandt used a window). A reflector or gentle fill light can modify the contrast between lit and unlit parts of the face, to taste.
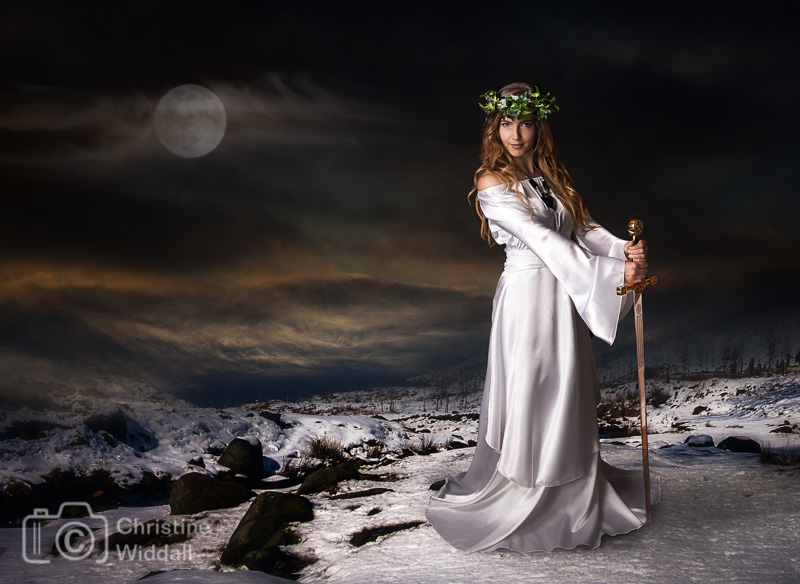
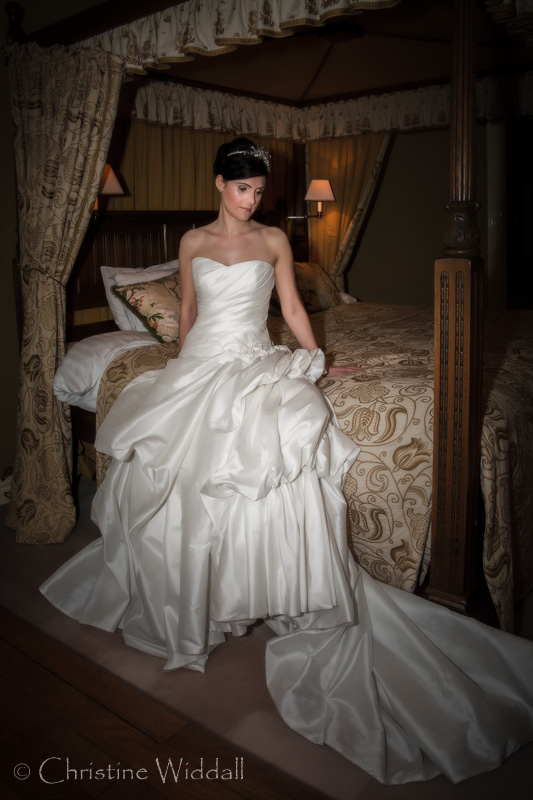
Mixed Lighting at Haslington Hall
The next examples, bridal fashion photography, employed natural daylight from a window augmented with a single flash, bounced off the ceiling. It’s the kind of lighting I have become very comfortable with.
The first of two images below has bounced flash balanced carefully with the ambient daylight and does not overpower the gentle tungsten light from the bed-side lamps. We were lucky enough to have the use of Haslington Hall, a beautiful Tudor Mansion near Crewe, and some sample wedding dresses, for the shoot.
Another bridal fashion shot, this time taken against the light, creates a little rim lighting to the model. A single flash unit was bounced off the ceiling as a fill light. The lighting is very soft and romantic in feel.

Some basic lighting tips based on my own experience
Unfortunately, the permutations of portrait lighting using two or three lights in different positions, with different brightness and possibly balancing with ambient lighting, are almost endless. It can become scary and confusing, so it’s definitely best to start off simply and build on what you know. The more lights you use, the more you are likely to get in a mess and produce some ugly lighting.
I would suggest concentrating on placing the main (key) light and get that positioned as you want it before adding in any fill. The main light on the model will give a different quality of light depending on how close it is from your subject…the closer it is, the bigger the light source is, in relation to the subject, and so it is softer. Also, with the same reasoning, the bigger the light-box or umbrella diffuser, the softer the light. Bouncing a light off a white ceiling will give an even softer light, because the ceiling becomes the light source, but you will also lose a lot of light in the process. So, put simply, the bigger the light source and closer it is to the model, the softer it becomes.
When we use continuous lights of fixed output, the rule of thumb is that, if the main light and the fill light are the same power, putting the fill at twice the distance from the subject as the main, would reduce the fill light to one quarter effective brightness. With studio flash, the same effect can be achieved, leaving the flash units where they are, but turning the power control of the fill light down…simples!
Once you have your main and fill lights sorted, it’s possible to add in a third light, maybe to light the hair or to light the background…make sure light doesn’t spill out and mess up your existing lighting by using “flags” or “barn doors” or “snoots” i.e. something to shade the light. There’s plenty of information on the web if you Google some of these terms. You can also “feather” the lights…this involves pointing the light slightly away from the subject so that only the edge of it illuminates the face…and this can also be used to control how much light falls on the background.
Enough! It is starting to sound difficult when it need not. Let’s start winding this up!
Aesthetically, the most pleasing aspects of portraiture are usually considered to be the eyes, because the eyes are usually the first thing that people look at in a portrait, so make sure they are adequately lit (or at least that you are achieving what you set out to achieve). Second in importance is usually the mouth and much less important are the nose and ears. Well lit ears and under-lit eyes?…no, really? So, the advice I would give, as a judge, is that, after your first test shots, look where the light is falling, how it enhances the face (or doesn’t) and modify the lighting before you waste your time and your model’s time and possibly incur a lot of expense for nothing.
However you choose to light your subject, use your own eyes! Be self-critical. Look at the result and feel the drama, mood and quality in the lighting that you have used. I intend to do just that and to keep on learning…it’s an exciting journey.